Creating and viewing access tokens
You can create and view access tokens from the website and command line interface (CLI).
Creating access tokens
Creating tokens on the website
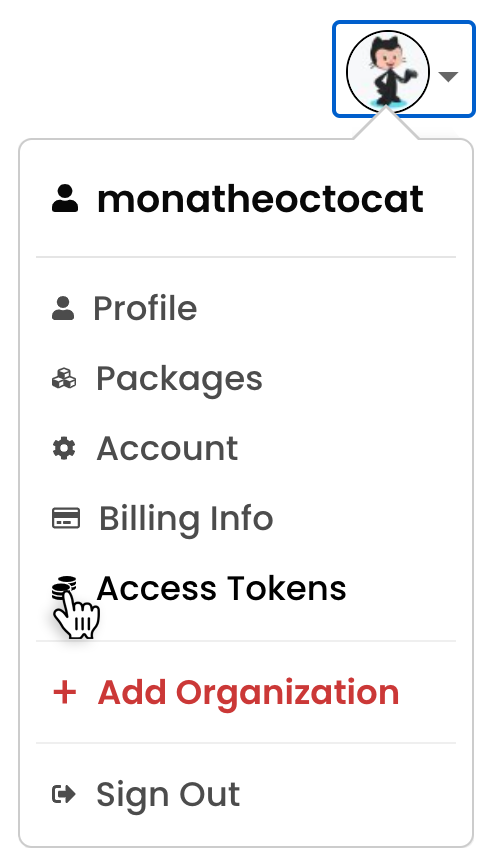
In the upper right corner of the page, click your profile picture, then click Access Tokens.

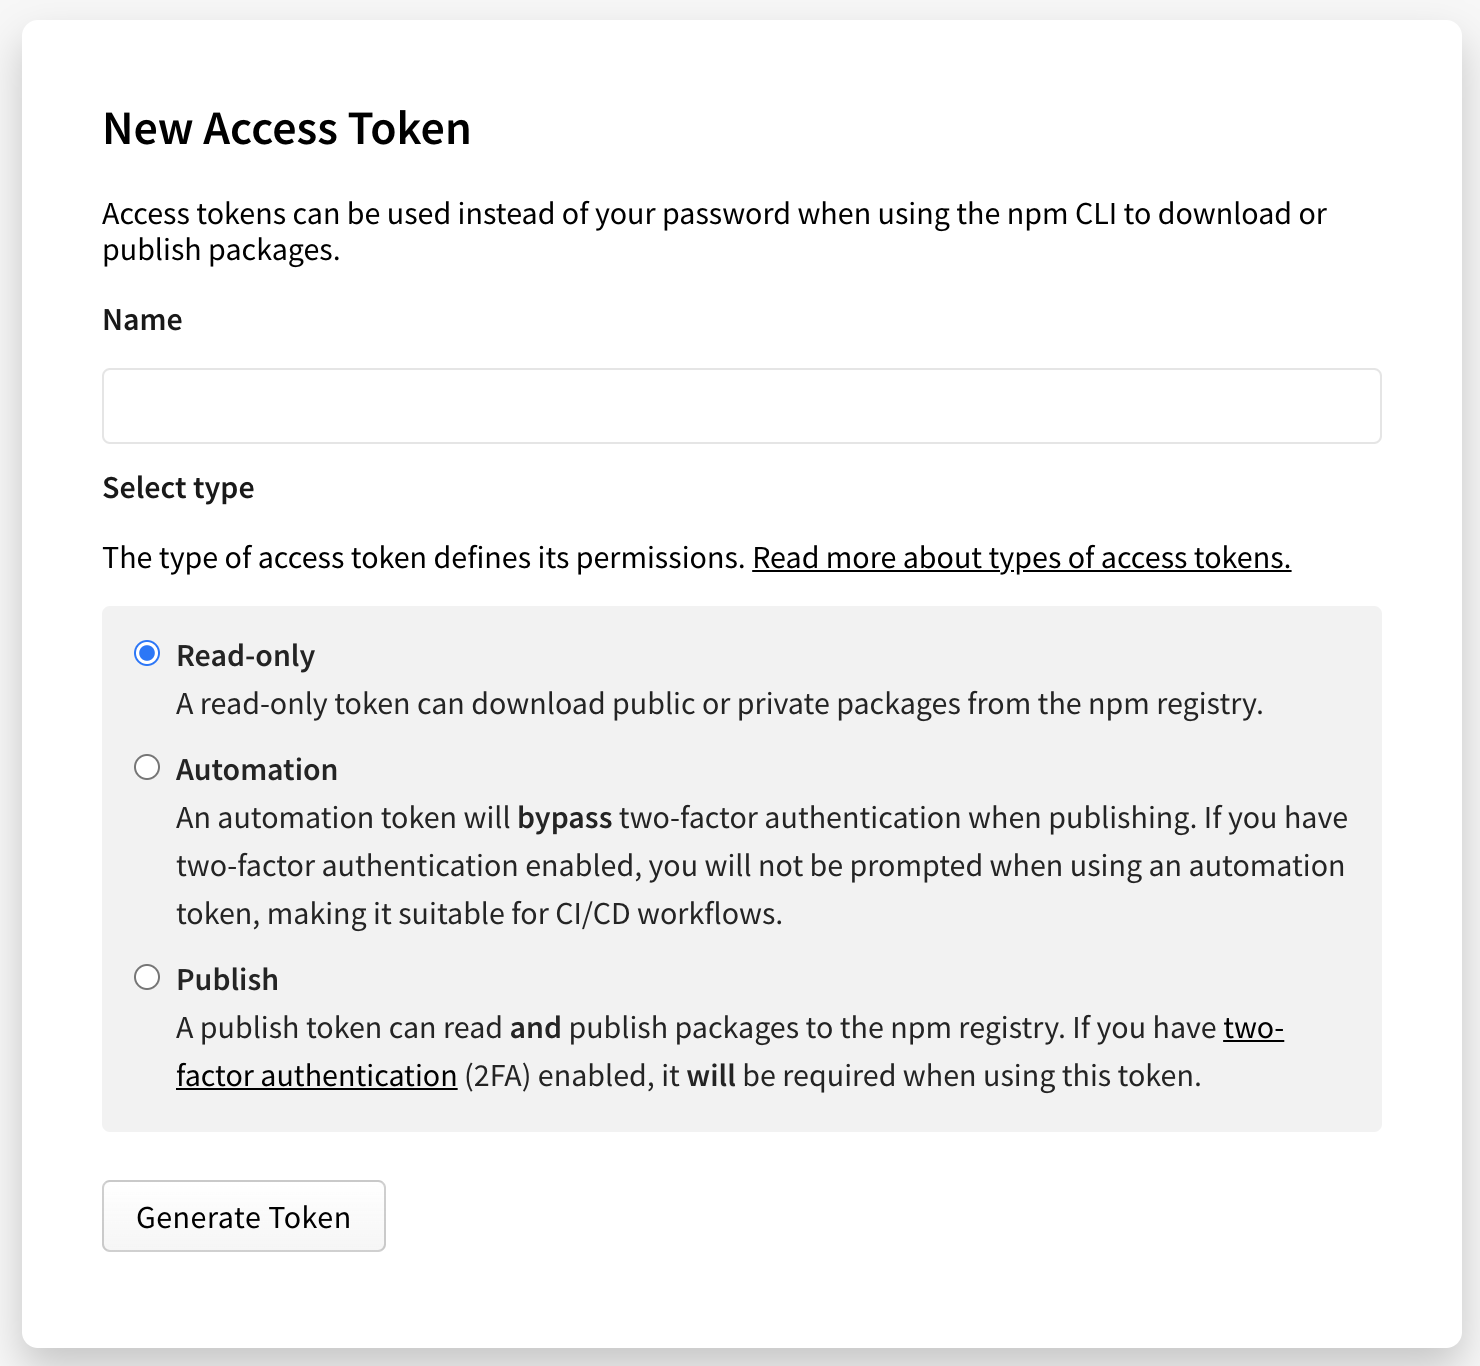
Click Generate New Token.

(Optional) Name your token
Select the type of access token:
Read-only: a read-only token can only be used to download packages from the registry. It will have permission to read any private package that you have access to. This is recommended for automation and workflows where you are installing packages, but not publishing new ones.
Automation: an automation token can download packages and publish new ones, but if you have two-factor authentication (2FA) configured on your account, it will not be enforced. You can use an automation token in continuous integration workflows and other automation systems to publish a package even when you cannot enter a one-time passcode. This is recommended for automation workflows where you are publishing new packages.
Publish: a publish token can perform any action on your behalf, including downloading packages, publishing packages, and changing user settings or package settings. If you have two-factor authentication configured on your account, you will be required to enter a one-time passcode when using a publish token. This is recommended for interactive workflows.

Click Generate Token.
Copy the token from the top of page.
Creating tokens with the CLI
You can create tokens with read-only permissions or read and publish permissions with the CLI; you cannot currently create automation tokens.
- Read-only: Tokens that allow installation and distribution only, but no publishing or other rights associated with your account.
- Publish: The default setting for new tokens, and most permissive token type. Publish tokens allow installation, distribution, modification, publishing, and all rights that you have on your account.
In addition, you can specify that the token is only valid for a specific IPv4 address range, using CIDR notation. The token will only be valid when used from the specified IP addresses.
- To create a new token, on the command line, run:
npm token createfor a read and publish tokennpm token create --read-onlyfor a read-only tokennpm token create --cidr=[list]for a CIDR-restricted read and publish token. For example,npm token create --cidr=192.0.2.0/24npm token create --read-only --cidr=[list]for a CIDR-restricted read-only token
- When prompted, enter your password.
- If you have enabled two-factor authentication, when prompted, enter a one-time password.
- Copy the token from the token field in the command output.
CIDR-restricted token errors
If the CIDR string you enter is invalid or in an inappropriate format, you will get an error similar to the one below:
npm ERR! CIDR whitelist contains invalid CIDR entry: X.X.X.X./YY,Z.Z.. . .
Make sure you are using a valid IPv4 range and try creating the token again.
Viewing access tokens
Note: Full tokens are never displayed, only the first and last four characters will be shown. You can only view a full token immediately after creation.
Viewing tokens on the website
To view all tokens associated with your account, in the upper right corner of the page, click your profile picture, then click Access Tokens.

Viewing tokens on the CLI
To view all tokens associated with your account, on the command line, run the following command:
npm token list
Token attributes
- id: Use the token ID to refer to the token in commands.
- token: The first digits of the actual token.
- create: Date the token was created.
- readonly: If yes, indicates a read-only token. If no, indicates a token with both read and publish permissions.
- CIDR whitelist: Restricts token use by IP address.